Schedule a requirement
Scheduling intro
When scheduling shifts that your candidates have performed for your company there are 2 big steps to take.
-
scheduling shifts
-
assigning candidates to fill in the scheduled shifts
A requirement can have one or more jobs and a job can have one or more shifts.
In order to schedule a requirement you can either
-
go to the live labour journal page and the click on the little green plus sign on the top right
-
You can also click on the global add button next to your name on the top right of the page and then select "Requiement" from the dropdown.
The add requirement page
The add requirement page is split vertically in two.
On the left side we have a form with details to fill in and on the right a preview calendar.
On this page you can schedule a requirement with one or multiple jobs and save them all at once.
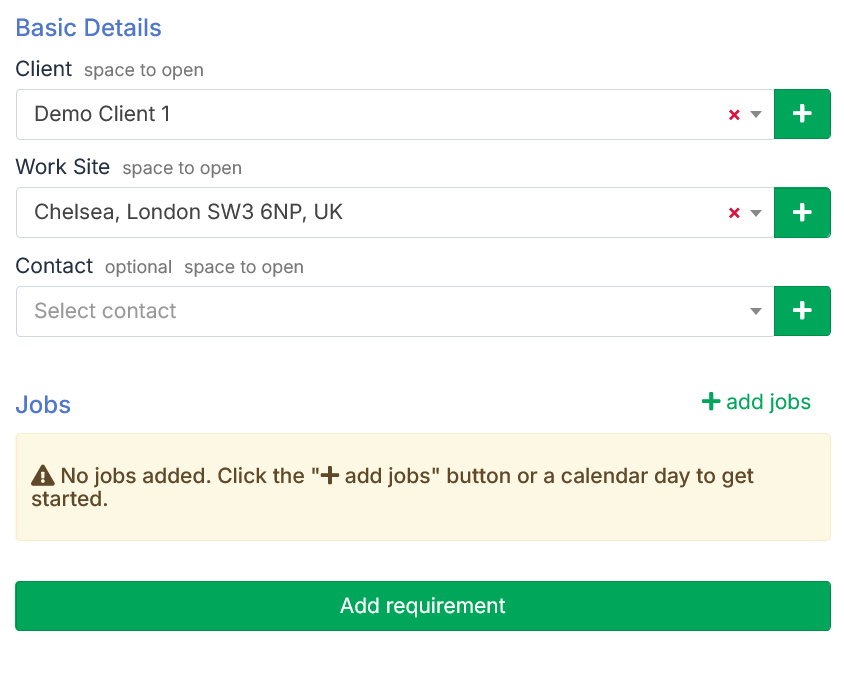
Basic details
Each requirement is attached to a Client and Work Site. The contact person is optional.
ℹ️ Apart from the Client and Work site, all data filled in here cand also be edited afterward.
-
Client: the Client for which the staff will perform the work.
-
When starting out you will not have any Clients in the system.
-
You can add a Client by clicking on the green + button right next to the input.
-
Only the Client name is mandatory.
-
After saving the Client you can select it from the dropdown.
-
-
Work site: the Work site at which the staff will perform the work.
-
When starting out you will not have any Work Sites in the system.
-
You can add a Work site by clicking on the green + button right next to the input.
-
Fill in the Work site name and Address. Be sure to select from the Google Powered dropdown when filling in the address.
-
After saving the Work site you can select it from the dropdown
-
-
Contact: the Contact person at the Work site, from the contacts linked to the work site.
-
Optional
-
When starting out you will not have any Contacts in the system.
-
You can add a Contact by clicking on the green + button right next to the input
-
Fill in the Contact details and click save
-
After saving the Contact you can select it from the dropdown
-
Jobs
Click on the + Add jobs button. A form will appear where you can schedule one or multiple jobs with the same characteristics.
Pay close attention to the Workload and the Attention frequency.
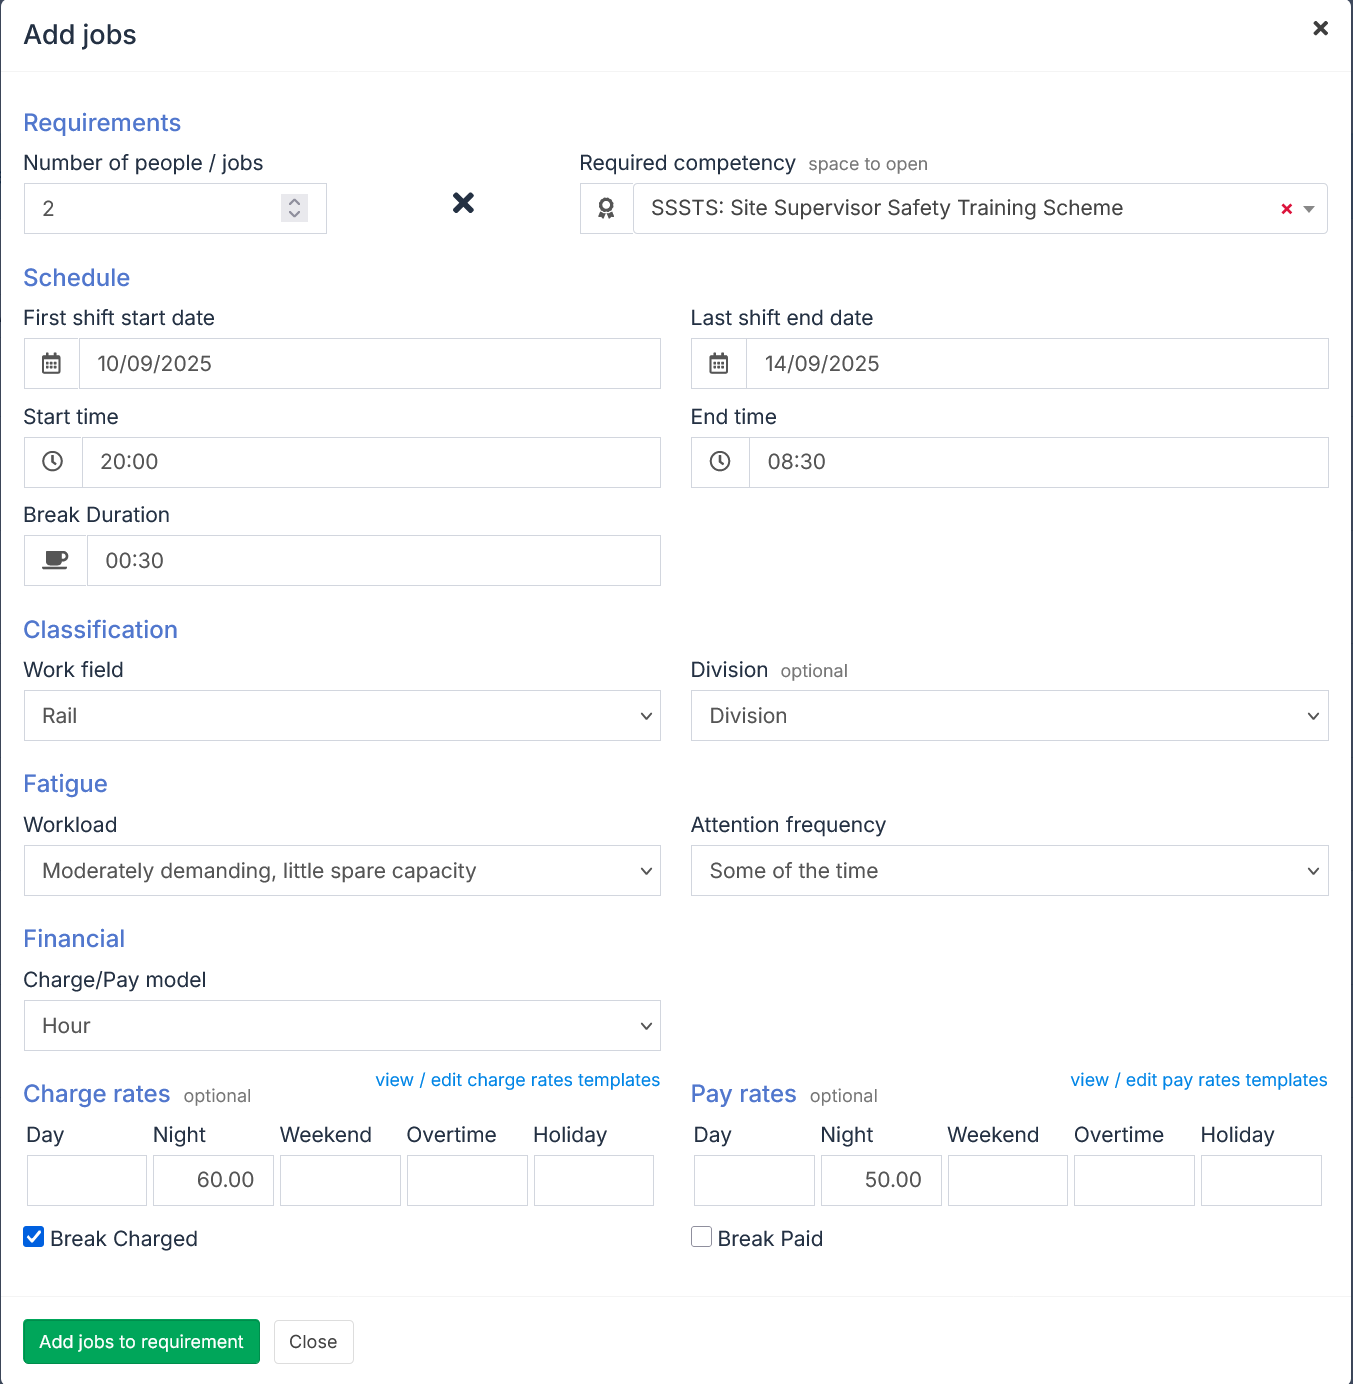
Click on the + Add jobs to requirement button on the form.
A box with minimum job details will appear under the + Add jobs button.
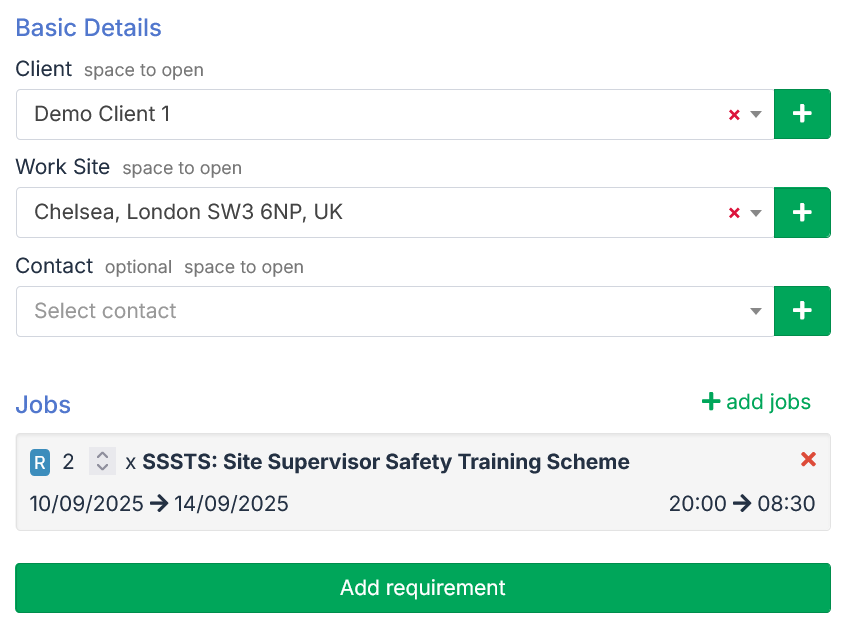
If you have made a mistake you can cancel the jobs package and add it again.
You can click on the + Add jobs button to add more jobs to this requirement.
Saving
After filling in the form you can click on the green Add requirement button in the bottom left and create the requirement.
You will be redirected to the new requirement's page.
The gray color of the shifts signifies that they do not have candidates assigned on them.
On the requirement page you can review shifts assigned to the newly created requirements.
The same shifts can be reviewed on the live labour journal page in their respective time frames.
Notes
-
to review all Clients you can go to the client list
-
to review all Work sites you can go to the work site list
-
to review all Contacts you can go to the contact list
Alternatives
If you want to skip this process and assigning candidates you can use the Batch Imports from Excel feature.